
The "Bolt Beam" is the attachment point for the
wing to the fuselage.
It will transfer all the tow-line loads from the tow hook to the wings during launch as well as handle the regular flight loads.
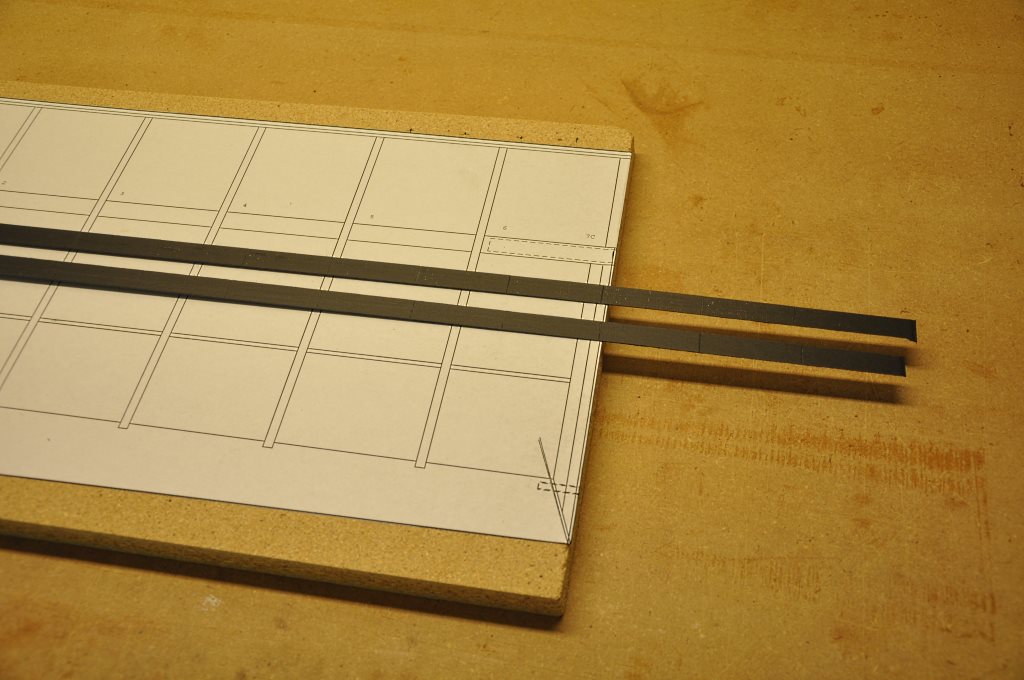
If you have purchased the tapered carbon fiber spar caps as specified on the plans (CST - C1952) you will see that there is a 6 inch overhang of the carbon on each end of the wing center panel.
We will be cutting this extra carbon off and use it for the bolt beam. See spar_V2.pdf.
It will transfer all the tow-line loads from the tow hook to the wings during launch as well as handle the regular flight loads.
If you have purchased the tapered carbon fiber spar caps as specified on the plans (CST - C1952) you will see that there is a 6 inch overhang of the carbon on each end of the wing center panel.
We will be cutting this extra carbon off and use it for the bolt beam. See spar_V2.pdf.
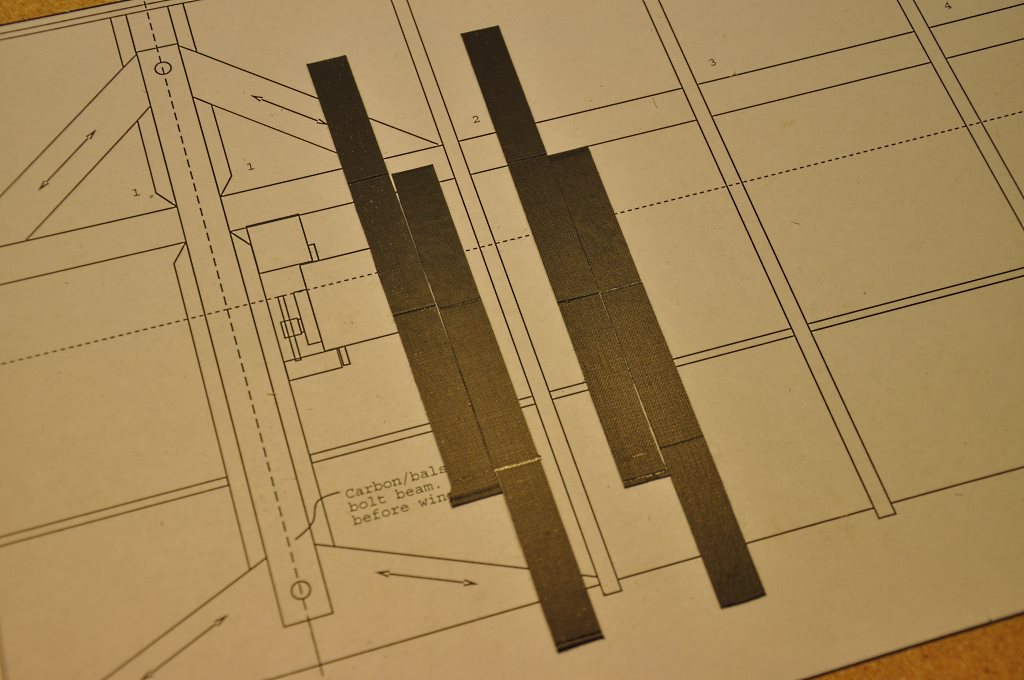
Here you see a closer image of the overlapping
carbon that we will remove for use in the bolt beam.
I marked the carbon at the cutting location, and then cut it with a razor saw in a small miter box.
I marked the carbon at the cutting location, and then cut it with a razor saw in a small miter box.

We now have 4 carbon strips left
over for the bolt beam and have set aside the wing spar carbon for
later use.
The carbon strips are not quite long enough (or thick enough) for the bolt beam caps but that will be fixed in the next steps...
I cut some 1/2 inch vertical grained balsa and some basswood for the core of the bolt beam.
The carbon strips are not quite long enough (or thick enough) for the bolt beam caps but that will be fixed in the next steps...
I cut some 1/2 inch vertical grained balsa and some basswood for the core of the bolt beam.
Take two of the carbon strips and rotate them so
that the thick sections are at the ends and the thin sections will
overlap.
Notice the steps in the thickness of the carbon strips. We will be aligning these steps when we glue up the bolt beam, so that we have an even thickness on the carbon caps.
Notice the steps in the thickness of the carbon strips. We will be aligning these steps when we glue up the bolt beam, so that we have an even thickness on the carbon caps.
I glued the wood together with thicked 5
minute epoxy.
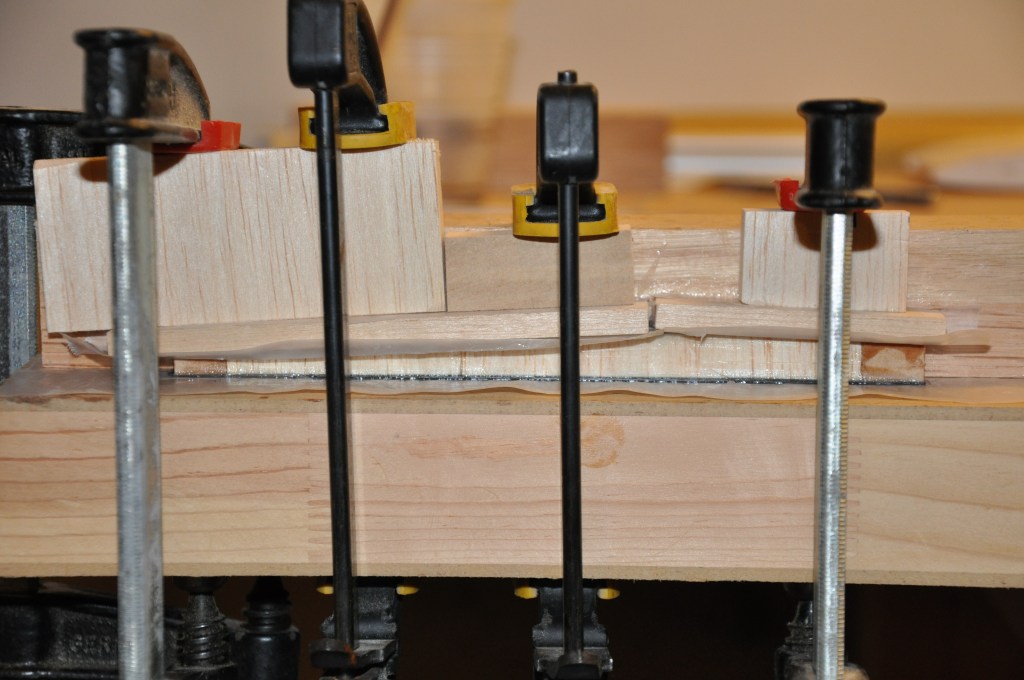
Using thickened epoxy, glue the carbon strips to
each other and to the wood core of the bolt beam.
Clamp the entire assembly together and allow the epoxy to cure.
Once the glue has cured enough to be 0handled, but before it is too hard to sand, remove the assembly from the clamps and clean up any excess epoxy.
At this time also round the sharp corners of the carbon caps so that they won't cut the fiberglass that we will be applying next.
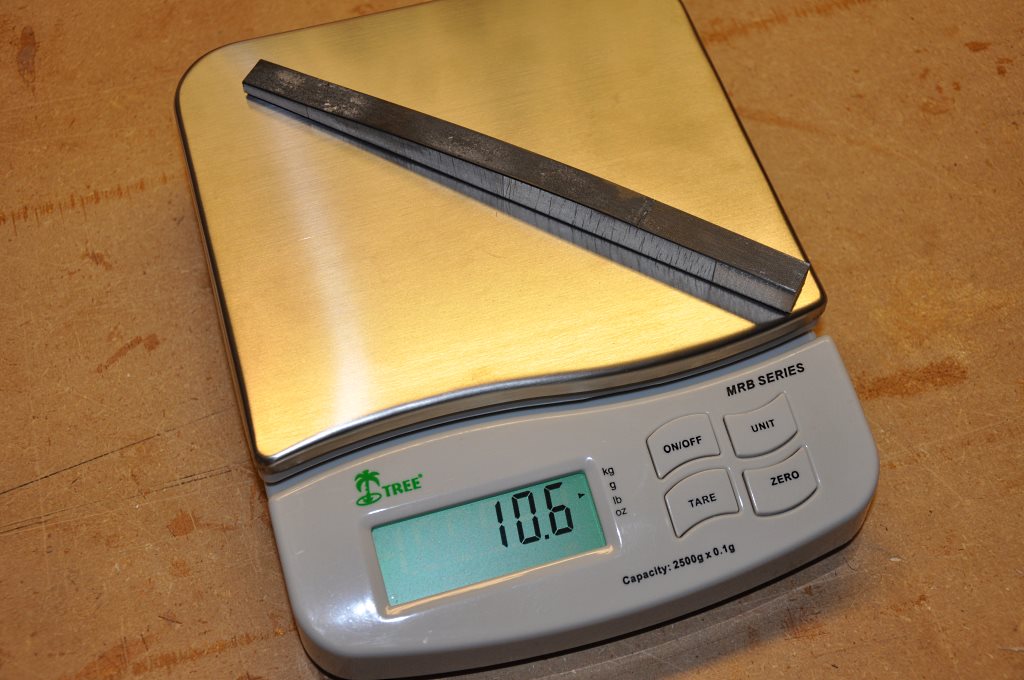
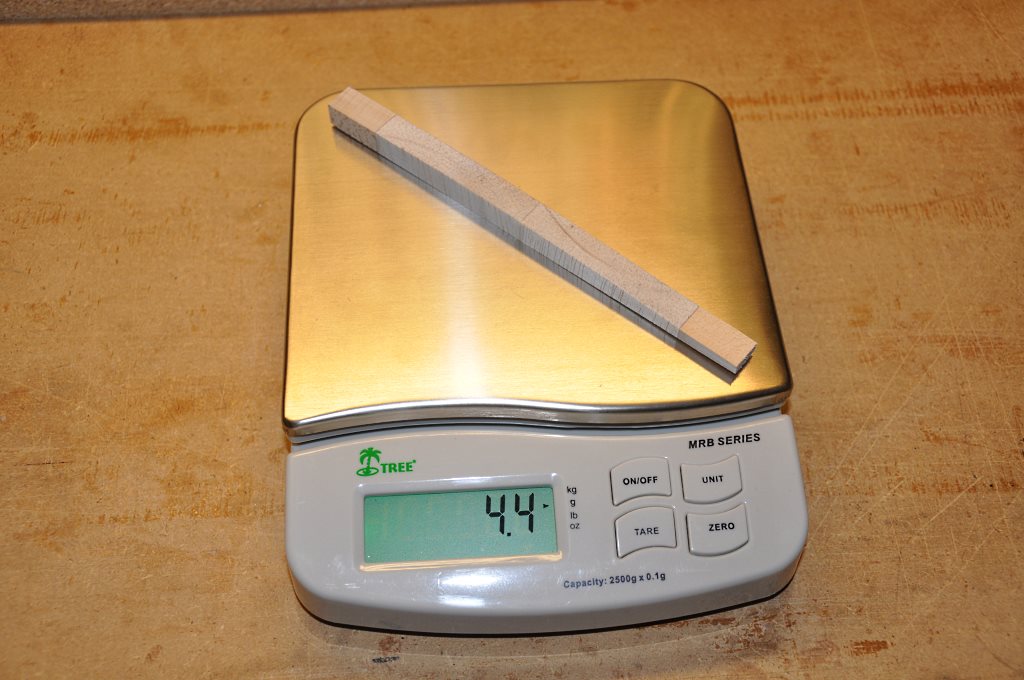
The cleaned up bolt beam is progressing nicely
and I'm checking its weight at each step to ensure that I'm staying
true to the specifications.
The biggest problem for weight will arise from using too much epoxy, so I'm keeping myself on track as I go.
The biggest problem for weight will arise from using too much epoxy, so I'm keeping myself on track as I go.
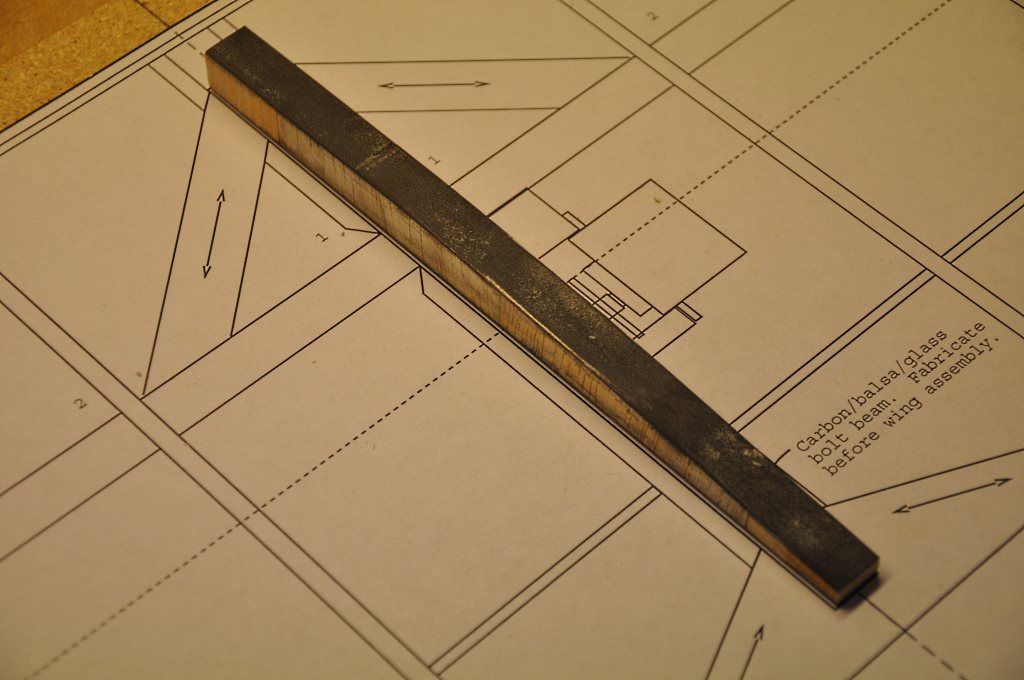
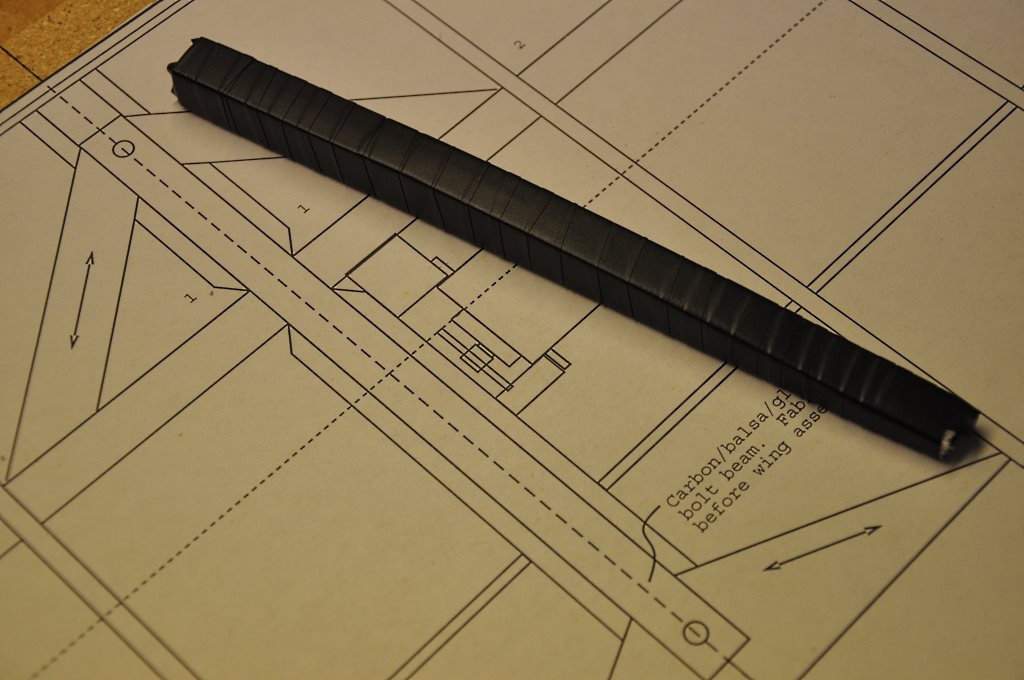
Just checking the shape of the bolt beam against
the plan.
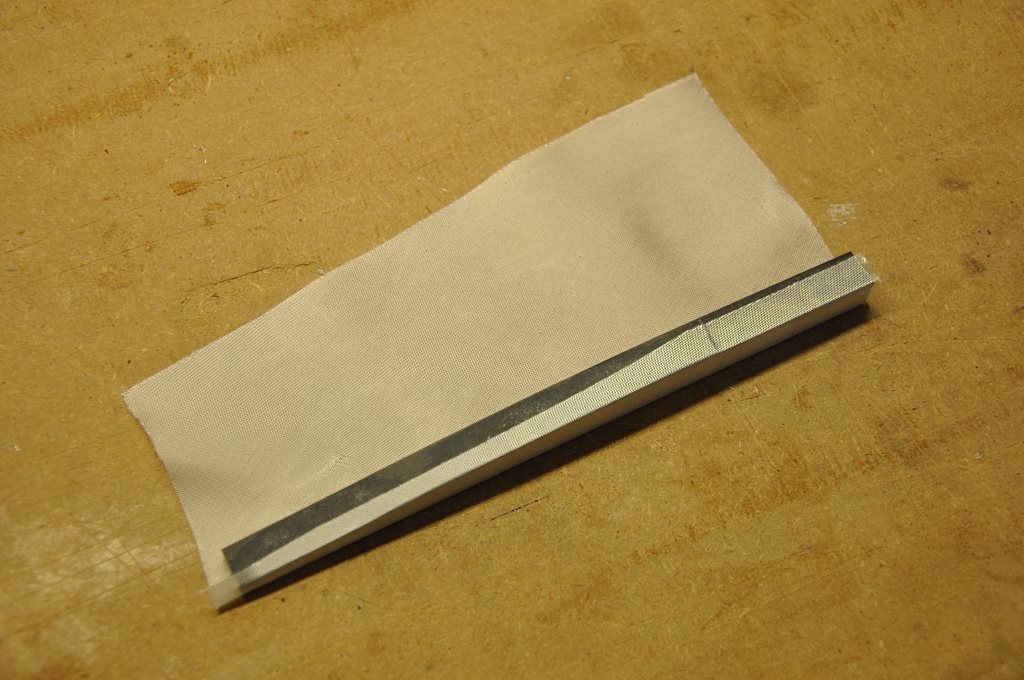
Next, cut some 2 oz. fiberglass on a 45 degree
bias. The plans call for the fiberglass to make 2 complete
wraps around the bolt beam.
In order to get the shape close, I wrapped some paper around the bolt beam and then used the paper as a template for the fiberglass.
In order to get the shape close, I wrapped some paper around the bolt beam and then used the paper as a template for the fiberglass.
I sprayed some 3M "Super 77" onto the fiberglass
which really helped me keep a tight wrap around the bolt beam as I
went.
Once I finished the wrap there was a little extra cloth which I trimmed off - I'm really trying not to have any unnecessary weight on the airplane!
Once I finished the wrap there was a little extra cloth which I trimmed off - I'm really trying not to have any unnecessary weight on the airplane!
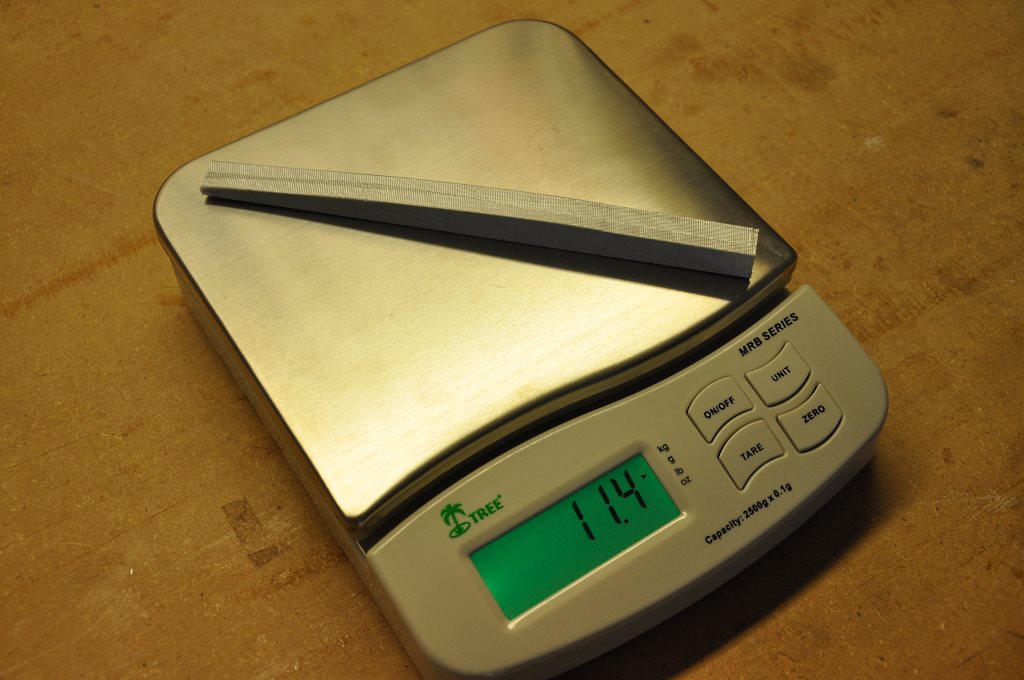
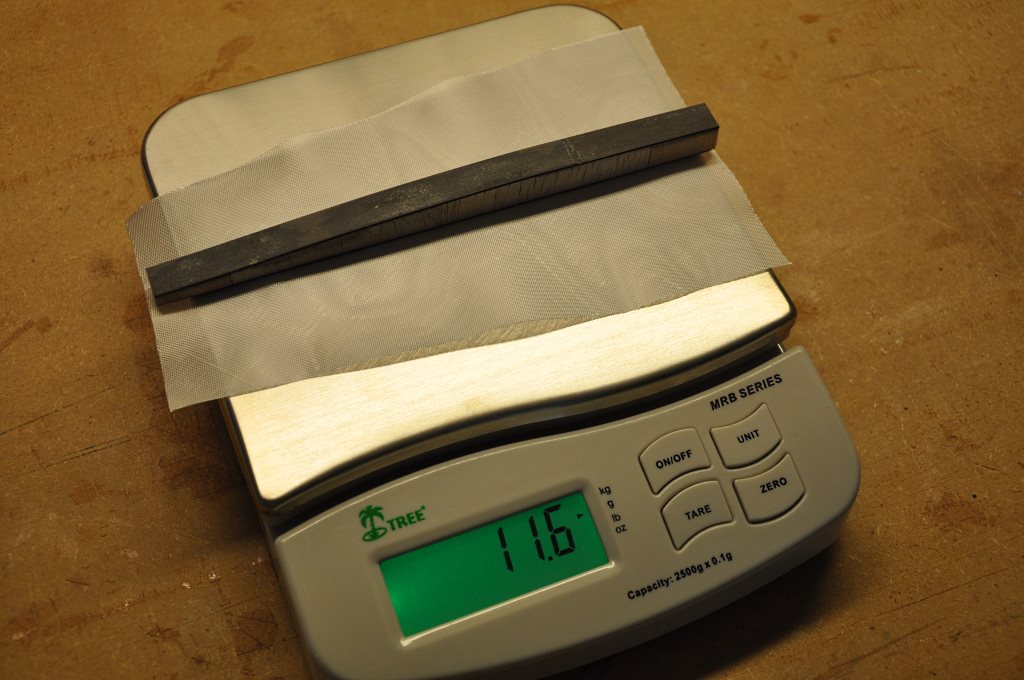
You can see in this shot of the wrapped bolt
beam, that I was able to remove .2 grams of fabric
Next I brushed on slow cure epoxy taking care to
use as little as absolutely necessary.
I used paper towels to blot off as much epoxy as I could and then wrapped the bolt beam with electrical tape to provide a nice clamping force until the epoxy cured.
I used paper towels to blot off as much epoxy as I could and then wrapped the bolt beam with electrical tape to provide a nice clamping force until the epoxy cured.

After the epoxy had cured I removed the
electrical tape and drilled 2 3/16 inch holes in the bolt beam.
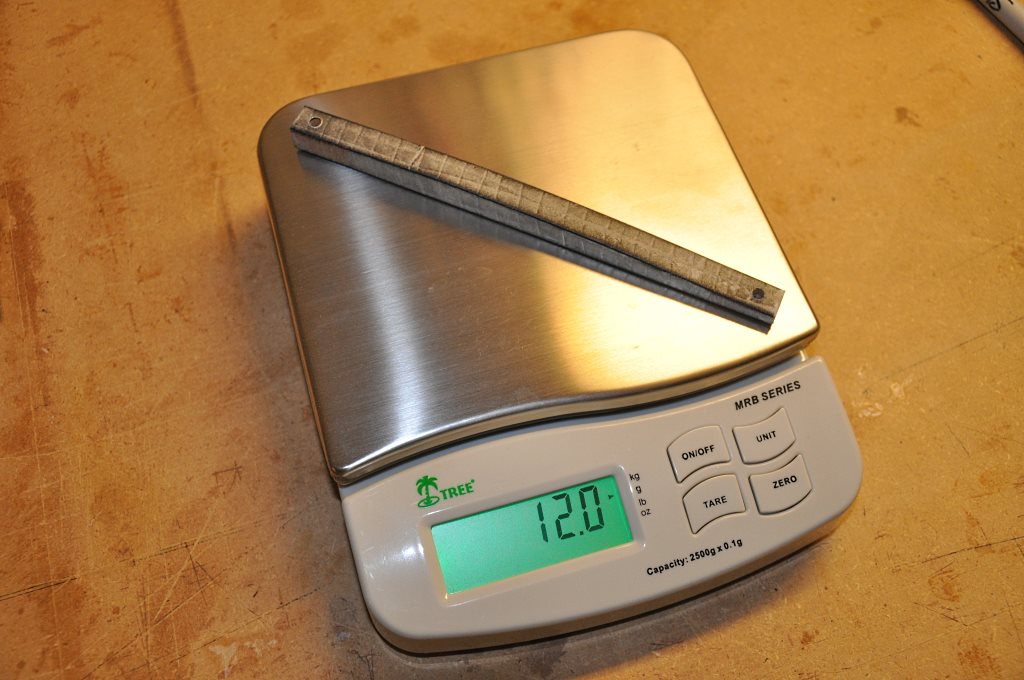
The finished bolt beam came out 1 gram under the
13 gram target weight specified on the Bubble Dancer plans.